Henna Tattoo | DIY Recipe

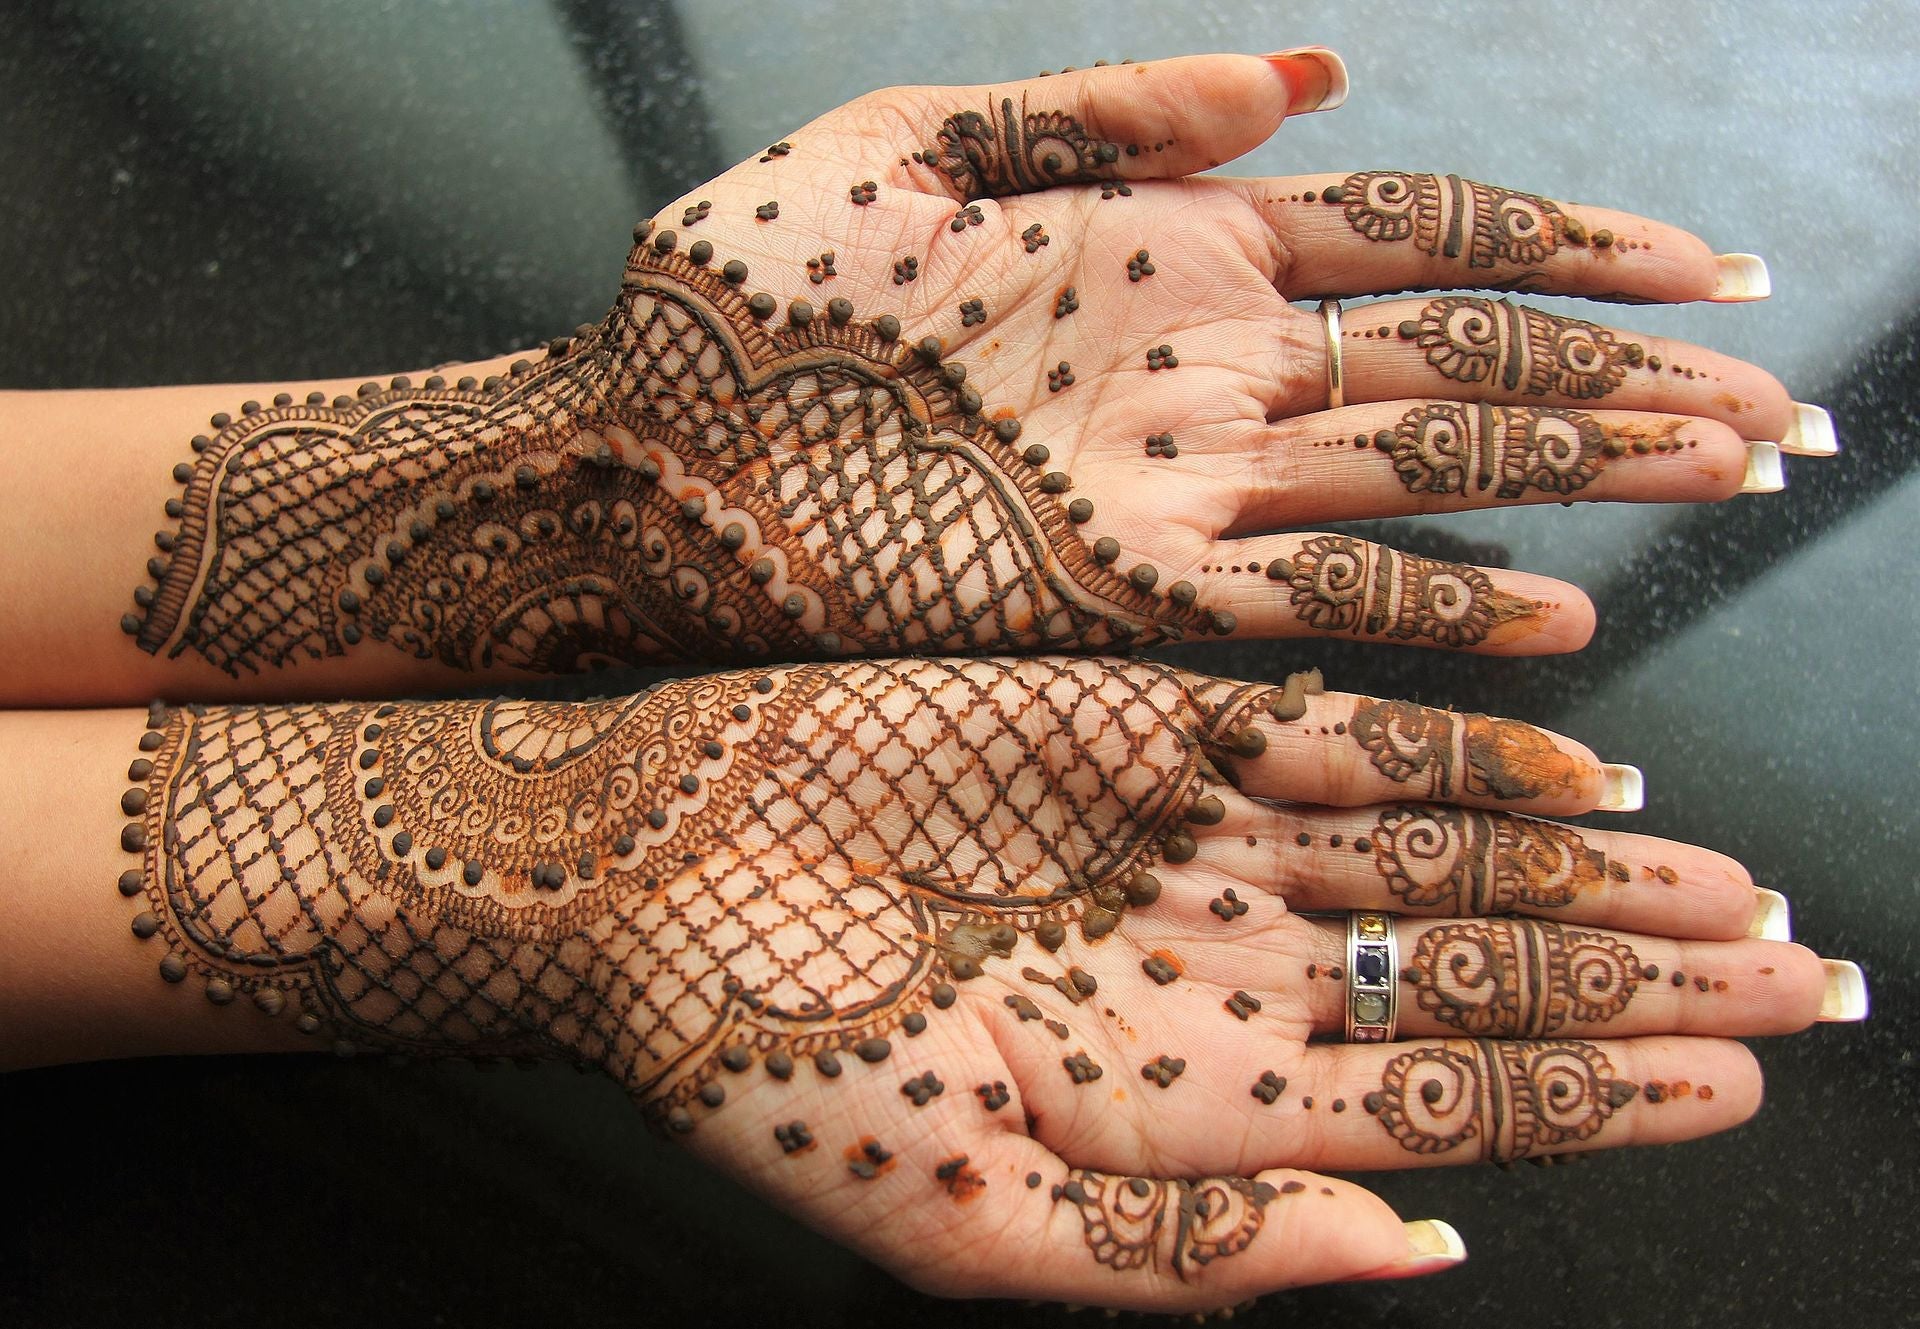

There is no arguing that henna tattoos are beautiful. But what is henna exactly, and where did it come from? We found out everything you need to know-- including how to make a henna tattoo.
What is henna?
Henna is a small flowering shrub that has many uses. The fragrant flowers are used to create perfume, and the leaves are dried and then turned into a fine powder that’s used for dying clothes, hair and temporarily dying the skin — hence henna tattooing. The plant has even been known to treat skin conditions.
Where did henna tattooing come from?
The exact origins of henna tattooing aren’t clear, however the tradition dates back as far as Ancient Egypt. It was said that Cleopatra used henna to adorn her body and Egyptians used the dye to paint the nails of mummies before they were buried.
Is henna safe?
The henna plant is one of the oldest cosmetics ever used. Natural henna rarely causes any adverse reactions, if you are concerned do a small patch test first and consult your physician. Natural henna is generally safe as it contains no chemical dyes or harsh additives.
How long does a henna tattoo last?
This depends on a few factors like skin type, lifestyle and body part, but generally speaking, the stain will last somewhere between one and three weeks.
Where can I get a henna tattoos?
Depending on where you live, it differs. In Chicago, for example, a few spas offer henna tattoos and there are a couple shops that are dedicated to henna specifically, but a quick Google search should help you find your nearest shop.
DIY henna recipe
Ingredients:
- Fresh Henna Powder, 10 grams or 1/8 Cup
- Bottled or Fresh Lemon Juice, strained
- Small Plastic or Glass Bowl
- Measuring Spoons
- 1 Teaspoon Sugar
- Essential Oils, 1 Teaspoon
- Plastic Sandwich Bag
- Applicator Bottle or Cone
Instructions:
Pour 10 grams of fresh henna powder into a bowl. Add 1/8 cup of lemon juice. Stir the henna and lemon juice until they are completely mixed together and no lumps of dry powder remain. The consistency will be similar to mashed potatoes.
Add 1 teaspoon of sugar. Sugar helps the paste stick to the skin by drawing moisture into the paste and prevents cracking and drying out of the paste. It also makes a silky smooth and creamy paste.
Add 1 teaspoon essential oil. Tea tree, eucalyptus, or lavender are all good choices. Mix the ingredients thoroughly. The essential oils will help to produce the deepest and darkest stain possible.
Keep stirring until the mixture smooths out and become silky. Cover the paste with plastic wrap. Pushing it down to dispel any air pockets.
Let the paste sit in a warm place, around 75 ° to 85° Fahrenheit, for 24 hours to allow the dye to be drawn out of the henna leaves so it will stain your skin deeply and as strong as possible.
After letting the henna mature for 24 hours it is ready to be used. Check and adjust your consistency if desired.
Now you're ready to fill your applicator and get started on your design!
Mix enough to use within 48 hours. Raw henna powder is light and heat sensitive as it is an organic product with no preservatives added. Store henna powder sealed tightly and protected from light, air, and moisture in the freezer.